
So you came home from the store with a pattern that you are just itching to start. You bought the fabric you want and the notions that the pattern required. So what do you do next? You guessed it, you MUST wash and dry the fabric if the fabric you bought can be cleaned that way. When you are shopping for fabric look at the end of the fabric bolt for the cleaning instructions. If you like fabric that is dry clean only then you do NOT have to wash and dry beforehand. I try to avoid buying dry clean only fabric, if the fabric can be laundered then that is what I buy. Just take note of the cleaning instructions and do so beforehand for ALL washable fabrics, especially for cotton as it will shrink.
Step 1: Wash and dry how you would normally care for your dirty clothes or take to dry cleaners BEFORE you start the next step.
I should also mention that your first attempt at sewing clothes should be a simple design. An example would be skirt or a dress. Shirts can be challenging but only if your sewing machine doesn't have buttonhole attachment. Pants are also another challenging item and would require some extra experience.
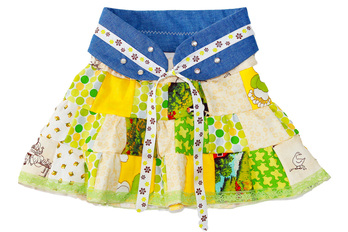
So lets pretend you bought yourself a skirt pattern. A simple flowing skirt with an elastic waistband. See image below.
Step 1: Wash and dry how you would normally care for your dirty clothes or take to dry cleaners BEFORE you start the next step.
I should also mention that your first attempt at sewing clothes should be a simple design. An example would be skirt or a dress. Shirts can be challenging but only if your sewing machine doesn't have buttonhole attachment. Pants are also another challenging item and would require some extra experience.
So lets pretend you bought yourself a skirt pattern. A simple flowing skirt with an elastic waistband. See image below.
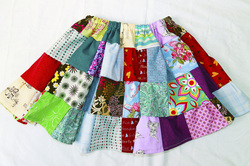
Ignore the patchwork of the skirt and focus instead on the shape of the flowing skirt. The waistband is made using elastic for an easy fit.
Step 2: Take out your pattern, laying out each page out on the table or floor (if you need more room). Open your pattern instructions and look for the illustration telling you which pattern pieces go with your skirt. Those pieces will be numbered for easy reference. Cut out the pieces you need and set aside.
Step 3: Iron your fabric (if the fabric can use the iron), you don't want wrinkles when trying to cut out pattern pieces.
Step 4: Now take your laundered fabric (or non-laundered if you bought dry clean only) and fold in half length-wise. The right side of the fabric should be folded in (or right-side together), with the wrong-side of fabric showing. Smooth out creases or wrinkles until the fabric is laying flat.
Step 5: Looking at your pattern pieces illustration take the pieces you cut out and lay them on the fabric as suggested. Note: Sometimes patterns have you place the pattern pieces right-side down (usually shown has a darker color), just check first with the instructions. Pay close attention to pieces requiring a folded edge and place accordingly.
Step 6: Pin your pieces to your fabric until each piece is secure.
Step 7: Cut out your pieces. Pay attention to notches ( those little triangles) and cut those out too. Notches are used to help pin fabric pieces together to make the clothing.
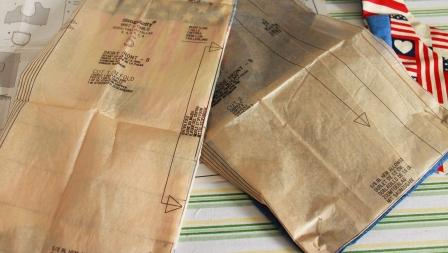
You will notice the picture above. The left-side of the picture shows you a pattern piece that is on the fold. The right-side photo has an arrow showing you the "grain" of the pattern to be placed on the fabric.
Step 8: You have completed the first segment on preparing the fabric and cutting out the fabric.
Step 8: You have completed the first segment on preparing the fabric and cutting out the fabric.


 RSS Feed